
Header photo by Mike Kononov on Unsplash
What is IPAM?
IPAM is also known as IP Address Management. It automates the method to track, maintain, and to manage the release of IP addresses (both IPv4 and IPv6 in most cases), in a way that removes the need for clunky spreadsheets and terrible text documents!
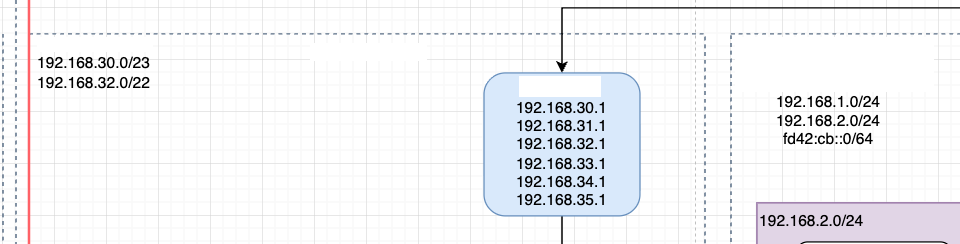
How many times have we all sat there and had to figure out which IP address ranges are in use, or where they overlap, or pull out a subnet calculator and really consider am I in the right place. Even I am guilty of it, as seen below, as part of my home network, I was trying really hard to make my IP addressing look “pretty” and assigned a 192.168.30.0 range to a router for a remote site. Except, the 30 element when you use use a previx of /22 or above, suddenly you are not in the .30 range anymore!
What’s worse about all this, AWS IPAM was released back in December 2021, which 4 years later, seems like I missed the boat! So, what was I to do, but have a go!
Why would I need it?
Other than the classic reasons or spreadsheets that are never kept up to date, or sprawling networks that no one ever seems to have control over, there are many other reasons too.
We are moving into a world where security is paramount and one of the key AWS Well-Architected best practices is to have separate AWS accounts for different workloads or environments. For many financial services, having completely isolated networks is a requirement too. On top of all of that, self-service has become a must-have when dealing with larger organisations to reduce the operational complexity and cognitive load of the IT teams.
This is where AWS IPAM can come into play, suddenly you can pool all your CIDR’s, and have the ability for accounts to request ranges, and it manage the usage of them, while making sure that no network overlaps.
Documentation on the AWS Website goes into more depth as to how it works and why.
That being said, for me, and my terrible management of my home network, I thought I might try and extend what I learnt from building it with my work, and try and get my own home network in on the action!
A while ago, I wrote a blog post about my “Zero Trust Network” router, of which I have been using for a while, which gives me essentially a Site-to-Site network between my home and an AWS VPC. To expand on this, I thought it might be an idea to setup IPAM and see what I could do!
Delegated Administrator for IPAM
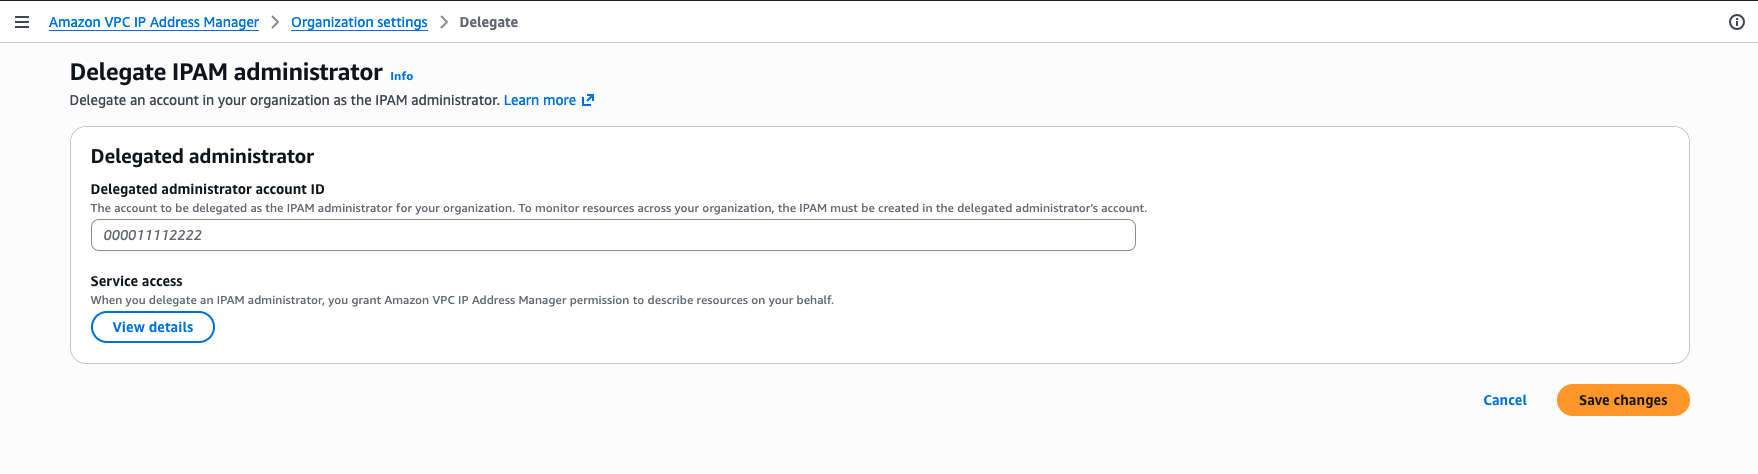
Before we start, the very first thing I had to do was enable the Delegated Administrator for the IPAM service. I currently run an AWS Organisation within my personal account, a little overkill, but it works great with my personal Office 365 setup, and using AWS IAM Identity Access Centre to access my accounts. I have an account I have proudly named “production” which typically contains what I consider to be my live systems, including the Tailscale Router!
Creating my personal IPAM
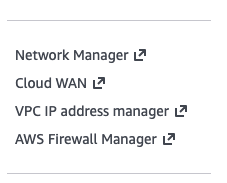
I have to admit, this was a little harder to find than other services, as it is hidden at the bottom of the menu on the VPC pages within the console.
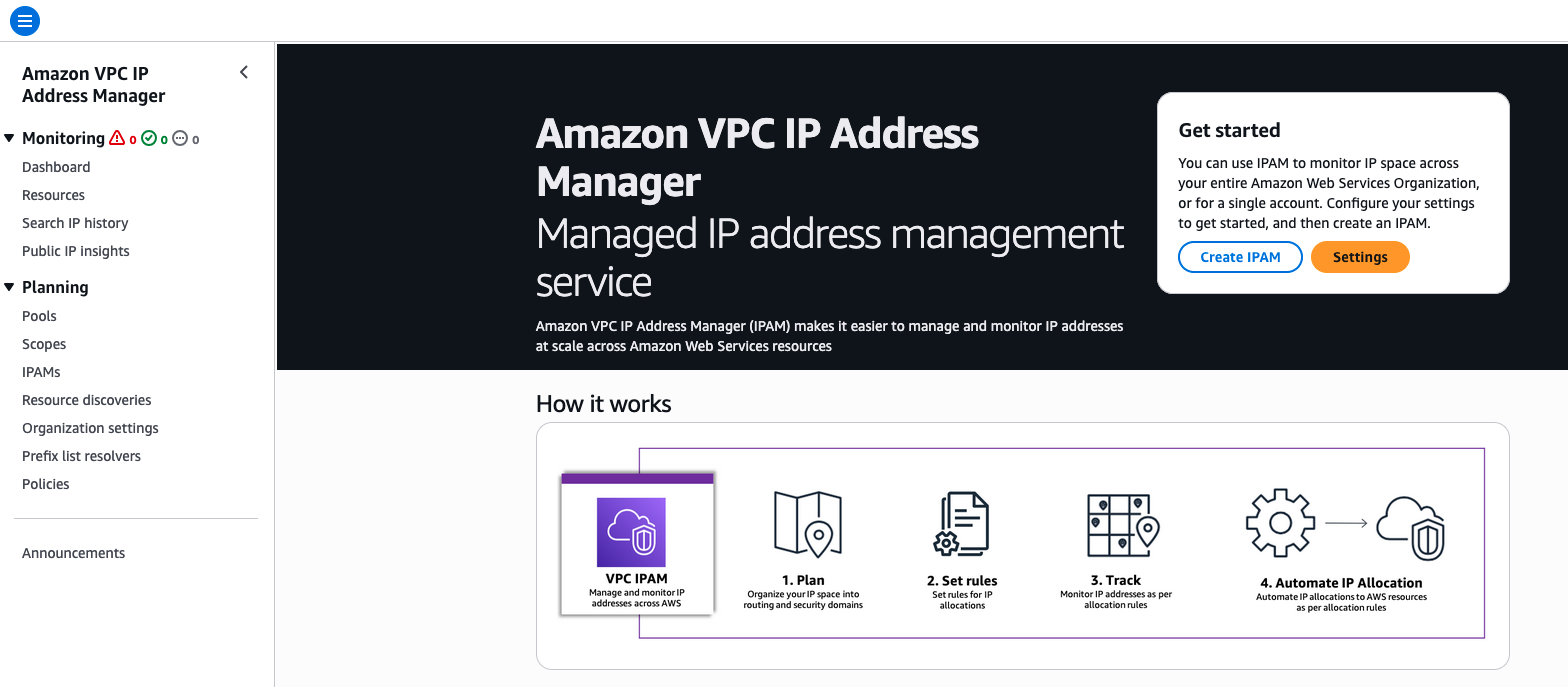
Once linked I am presented with the usual IPAM page
To make this work, having looked at the available options, the Free Tier wouldn’t really cut it for me. The features available for the Free Tier are great for smaller AWS only networks, but I wanted to be able to manage my home network ranges as well, so I would have to use the Advanced Tier.
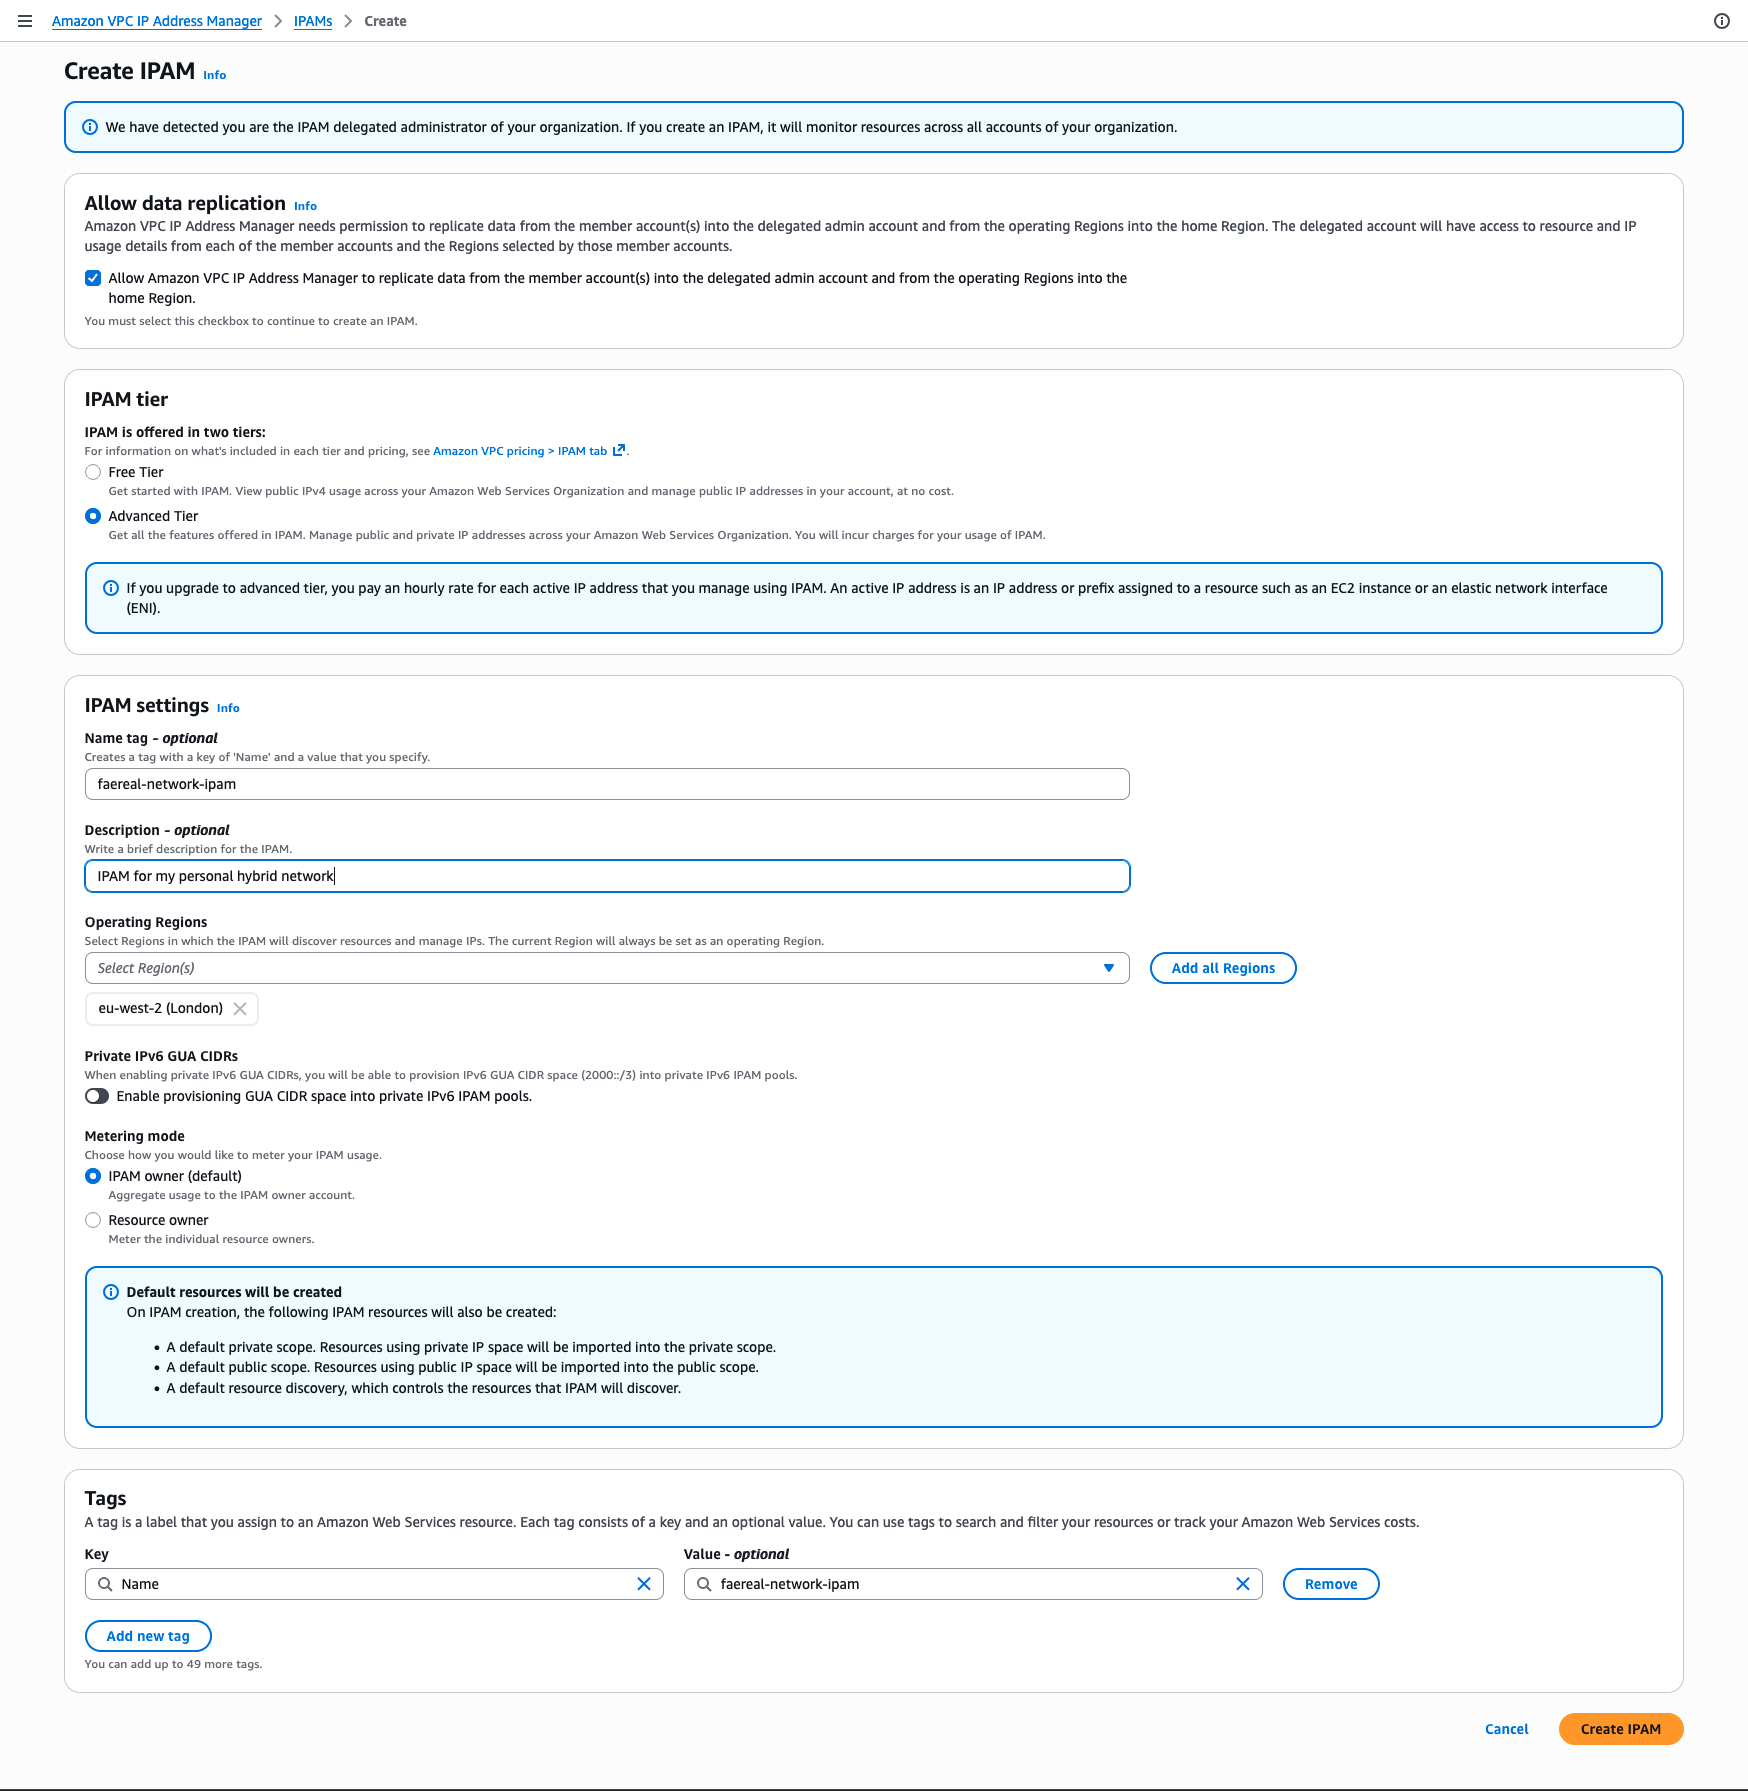
Here you can see I have entered the name for my network, but also left my operating regions to just eu-west-2 (London) as this is the only region I have anything in. The only option I found a little odd was the “Allow data replication”, as this needs to be ticked to continue, as we do need this for it to understand the wider context of my AWS accounts. As I ticked this, I did have a horrible feeling that my default VPC’s still existed in every other account!
Scopes, Pools, and Allocations
The creation of an IPv4 IPAM will need you to create Scopes, Pools, and Allocations. And there is a simple hierarchy available in the AWS Documentation, but it can be simply shown as below:
|
|
This helped me understand how I would create the scopes and pools, and my idea was to create them as follows:
|
|
In this case, I do have two networks at home, one for my normal every day, and one for my IOT. If anyone is interested, my IOT Home Automation repo is available at github.com/mystcb/home-automation.
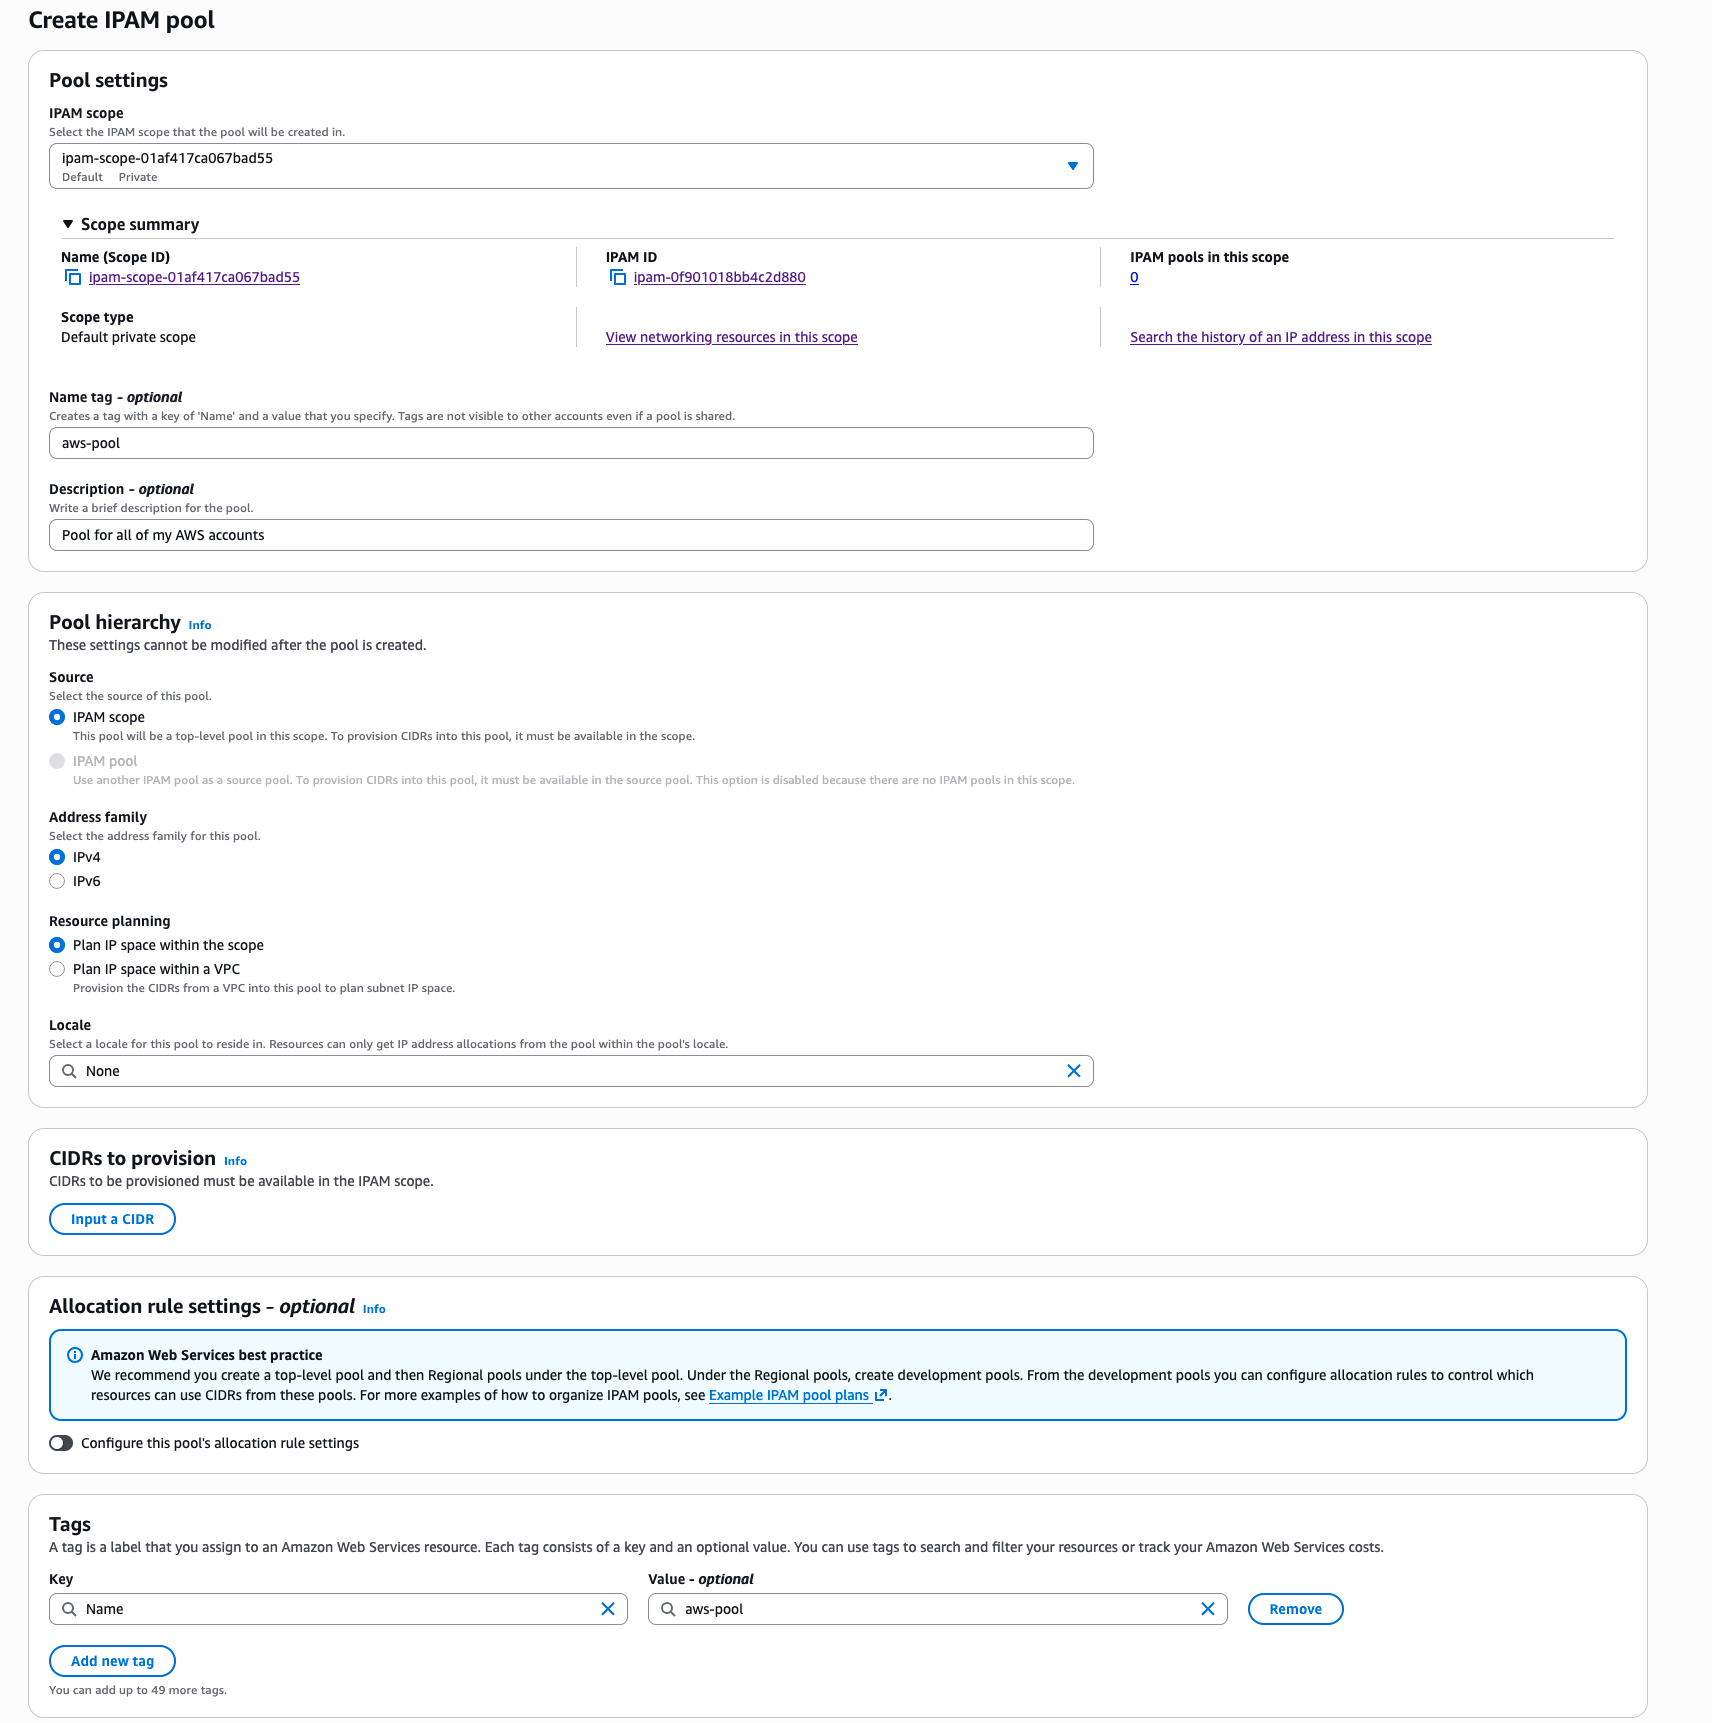
So lets start creating my Top-Level Pools! Starting with my AWS side of the Pool. As you can see in my setup above, I have “left room to grow”. As this is just me playing around, it will be interesting to see how this works. Worryingly, I can see myself getting way more networks than sense!
When I created the IPAM though, it automatically created me two scopes
|
|
IPAM will monitor both private and public IP addresses, which can be really handy when you use public IP’s on AWS. Its good to see where they are allocated, and how many you have. With my work, I found loads of optimisation options that were available to try and reduce cost, by consolidating the services that had public IPs! However, I digress and I really should be getting my first pool setup!
One step that seemed to take a while was the provisioning of the CIDR 10.0.0.0/8 took about 45 seconds for me, but it eventually showed as Provisioned.
Next I moved onto the Regional Pool, now this page is a lot longer than the previous, there was a lot more to add.
EDIT: This screenshot has been updated since the blog post originally was published to the latest version

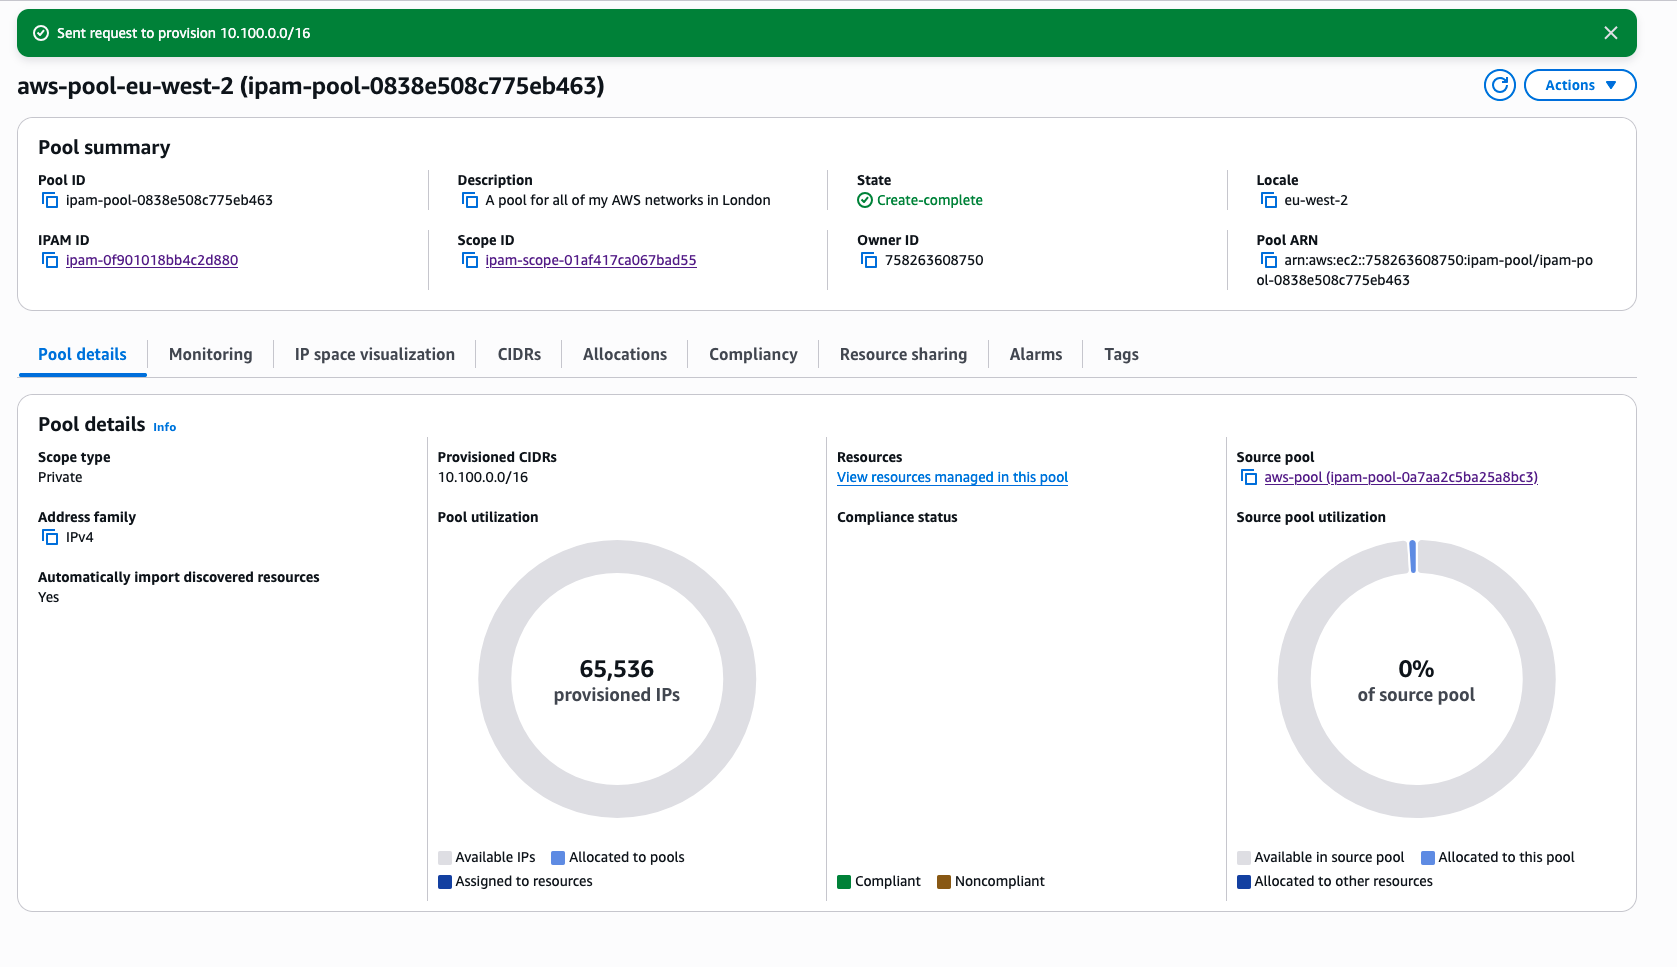
Since writing this blog, there have been some minor changes, and before I had to bring my own VPC into “Compliance” however, this was automatically completed and made compliant!
Home and Tailscale Pools
Next I moved onto my home network, this is pretty much the same as the setup of the pool for the top level of my AWS ranges, so I simply ran through the same options:
- Private scope
- IPAM scope (top level)
- CIDR:
192.168.0.0/16 - Name:
home-pool
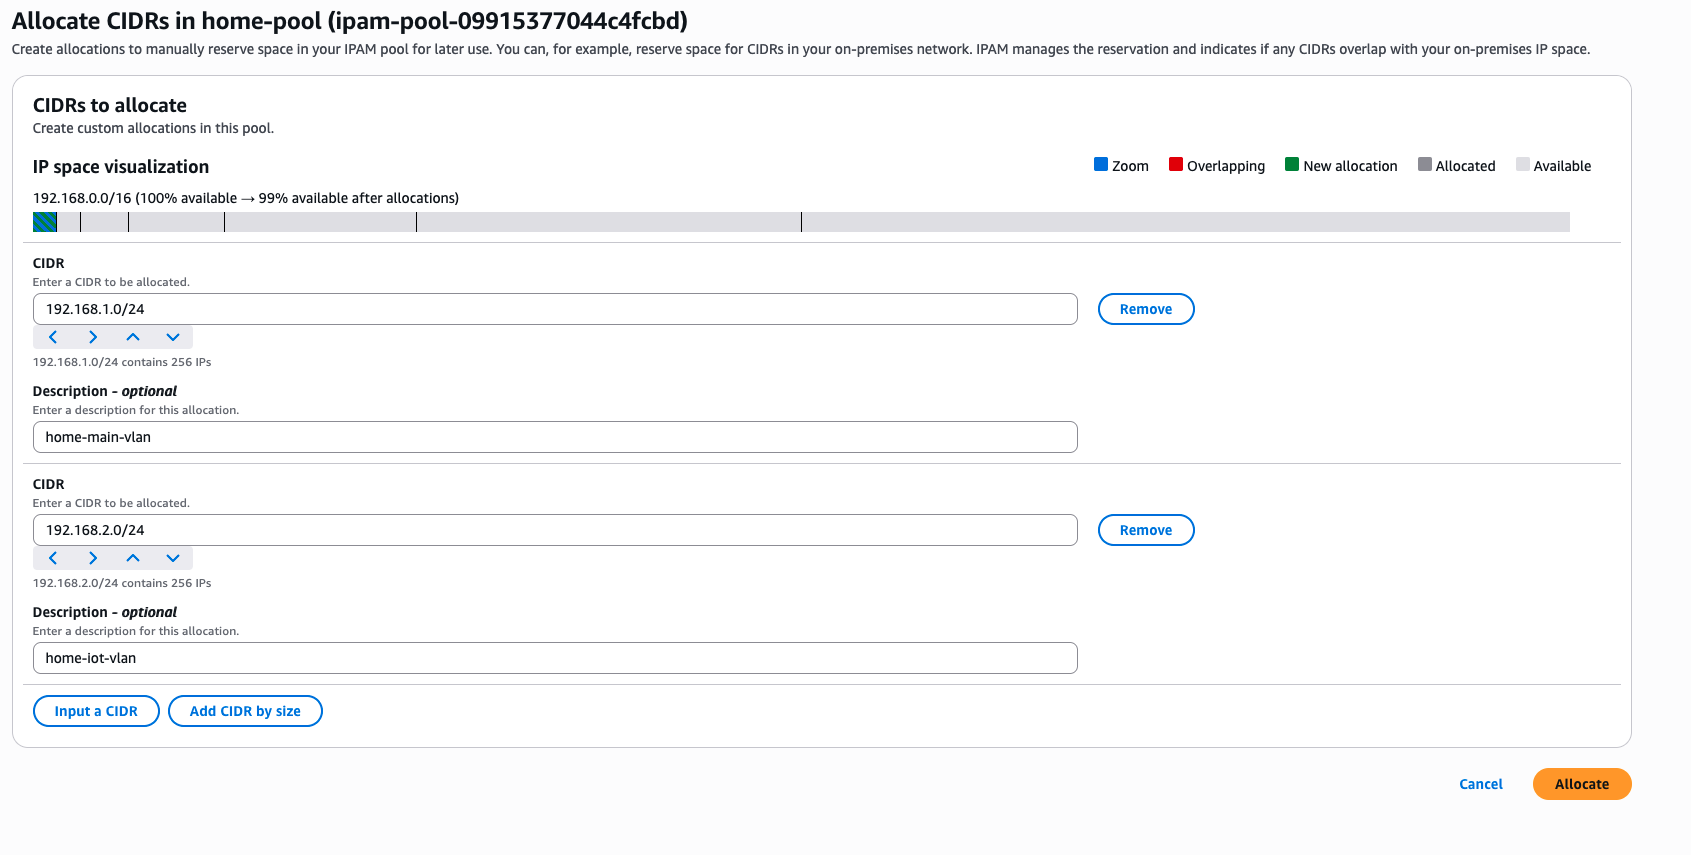
At this point, I had to create a number of “Custom Allocations” within the pool, rather than a new sub-pool. This is where the manual reservations came into play. Specifically telling IPAM that these are all reserved and shouldn’t be taken.
Pretty much the same setup for the Tailscale network too, same pool information, same custom allocation, but all within the 100.24.0.0/10 range. This range is Tailscale’s range they use which is within the CGNAT private address range.
Testing IPAM works
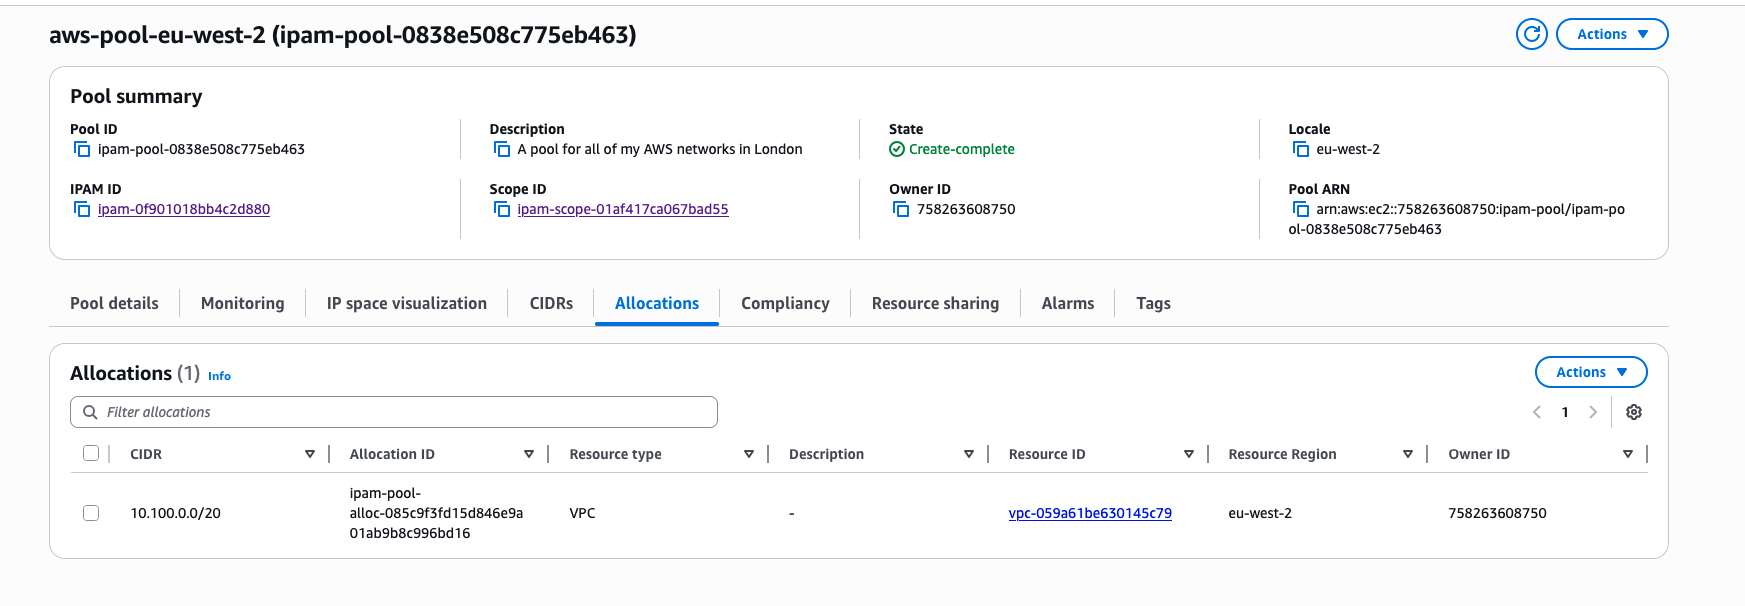
Creating a new VPC within the console has the option to select a range from the IPAM pool.
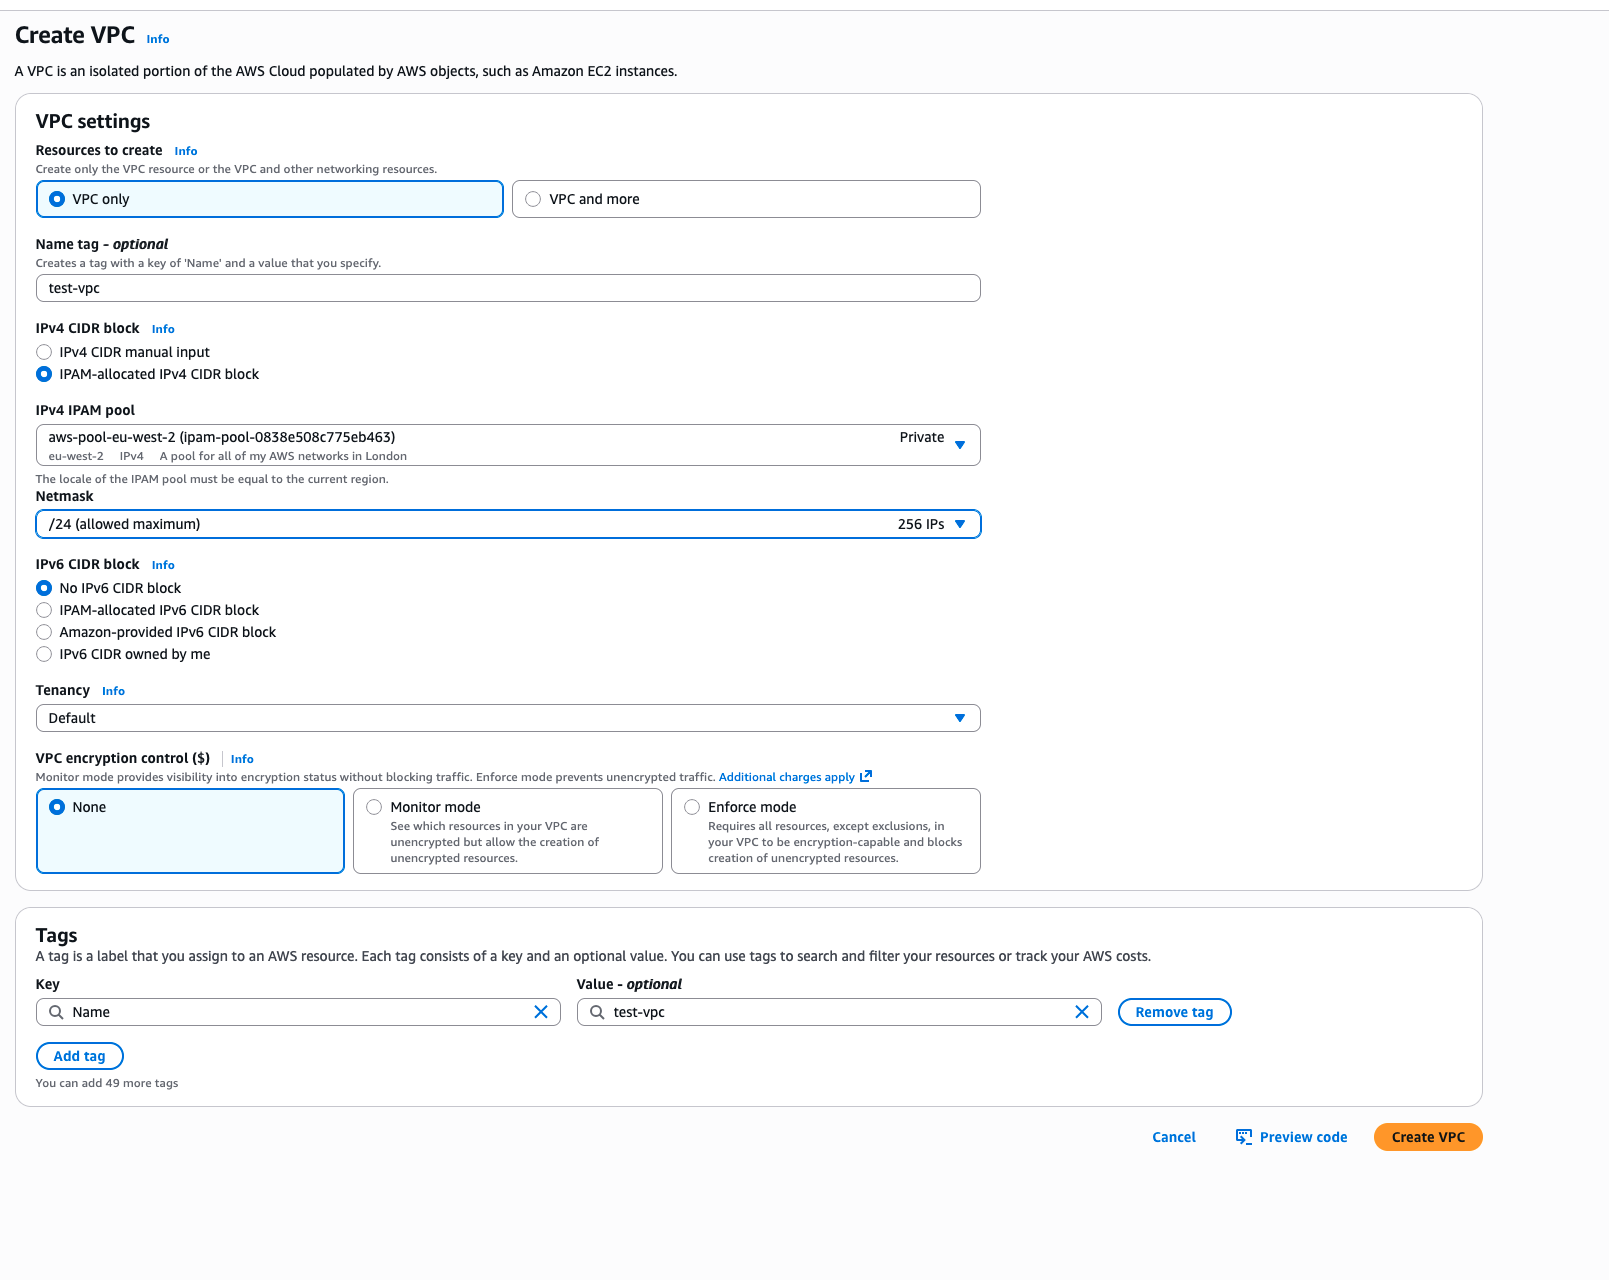
This has the handy approach that I do not not have to think about the CIDR that I need to allocate, I just tell the pool to grant me one that, and the VPC is created.
This can be selected through IaC as well, rolling back to my work setup, when I am in a rush and need to create a VPC quickly, I use the Terraform AWS VPC Module, which in a normal sense you would choose the cidr_block but it offers the ability to choose the IPAM pool associated to it. This way my code is neat with no hard coded configuration options, and it will allocate me a CIDR range
|
|
With my work setup, we also use IPv6 as well, but I am going to cover that in another blog post, I need to get my IPv6 networks at home up and running too!
Conclusion
After going down the path of IPAM, I do recognise that in this case there was a lot of manual custom setup. Within the grounds of AWS and the AWS Organizations I can see this being really helpful to cross the gaps. Using a service such as AWS Resource Access Manager (RAM) you can share the pools across multiple AWS Accounts as well, allowing for a single pool for your whole organisation.
When working with my home network, it is handy, although looking at the grand scheme of things, I have been able to keep my networks separate by choosing completely different RFC1918 ranges!
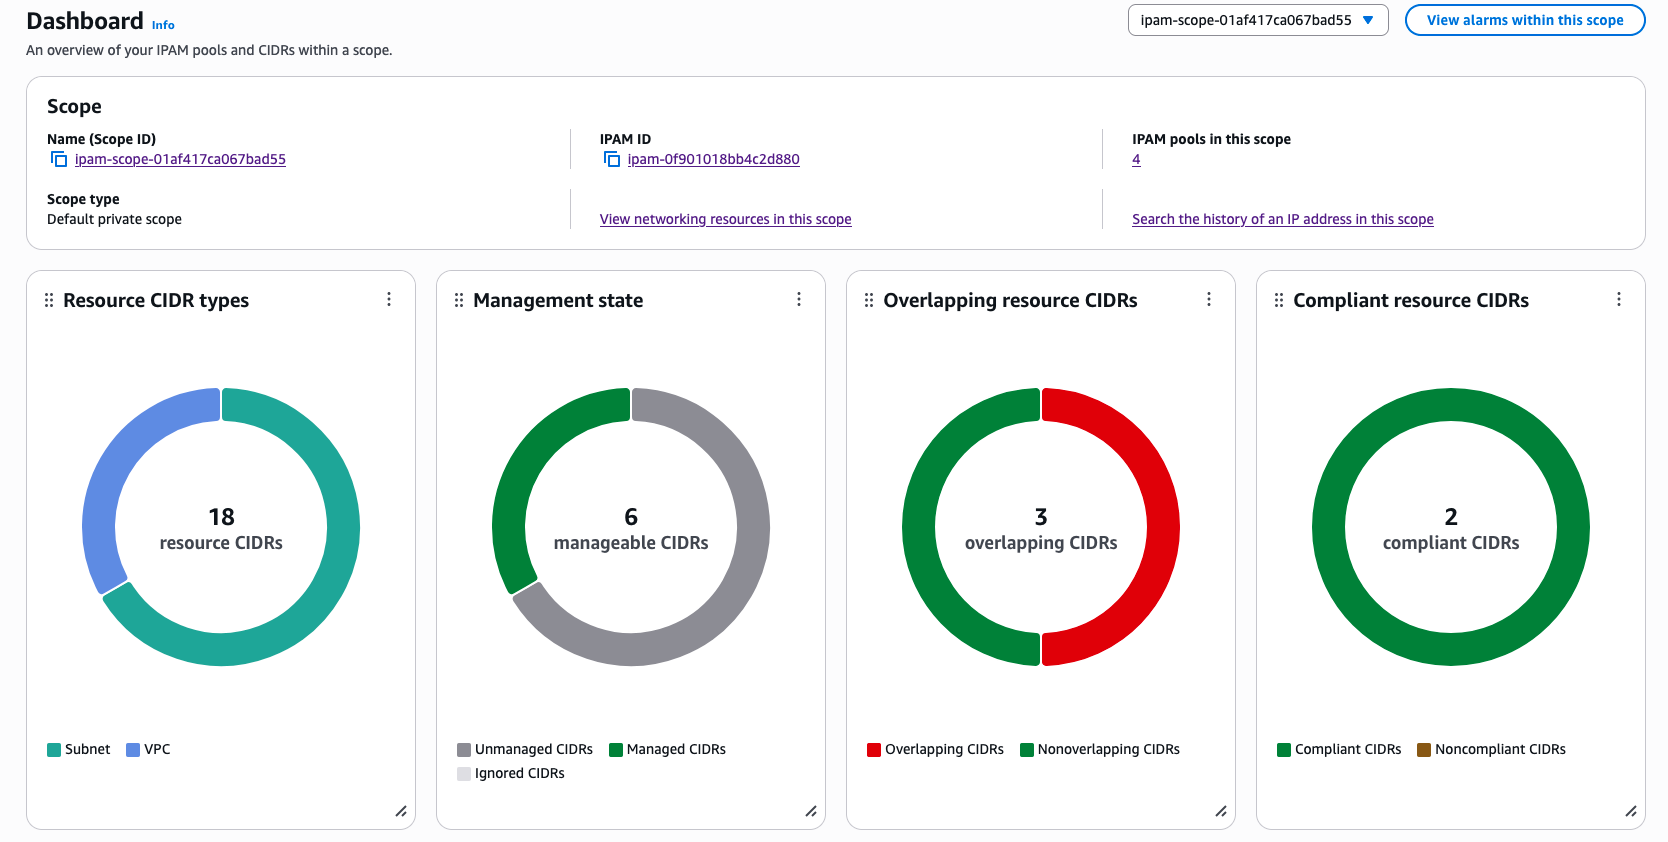
Having details from the dashboard has been handy too, the way you can “zoom in” to the different ranges to see what is left can be really good. Given this is all available through the AWS API as well, 3rd Party products can also interact with IPAM and allocate the addresses directly.
Within an AWS Organiztion as well, it is possible to set SCP’s and IAM conditions that will prevent people from creating VPC’s that do not come from the IPAM pool:
|
|
Here is a simple SCP policy I created for my work systems, which blocks both the creation of the VPC as well as Associating additional CIDR blocks too. That last one is very key to stop people bypassing the pool!
There is so much more to the IPAM system, so I will return to this. As a network administrator for a large organisation, the information and the guardrails around IP allocation would easily cover the cost for running IPAM, just in reduced effort and cognative load, as well as the endless battle with overlapping IPs.
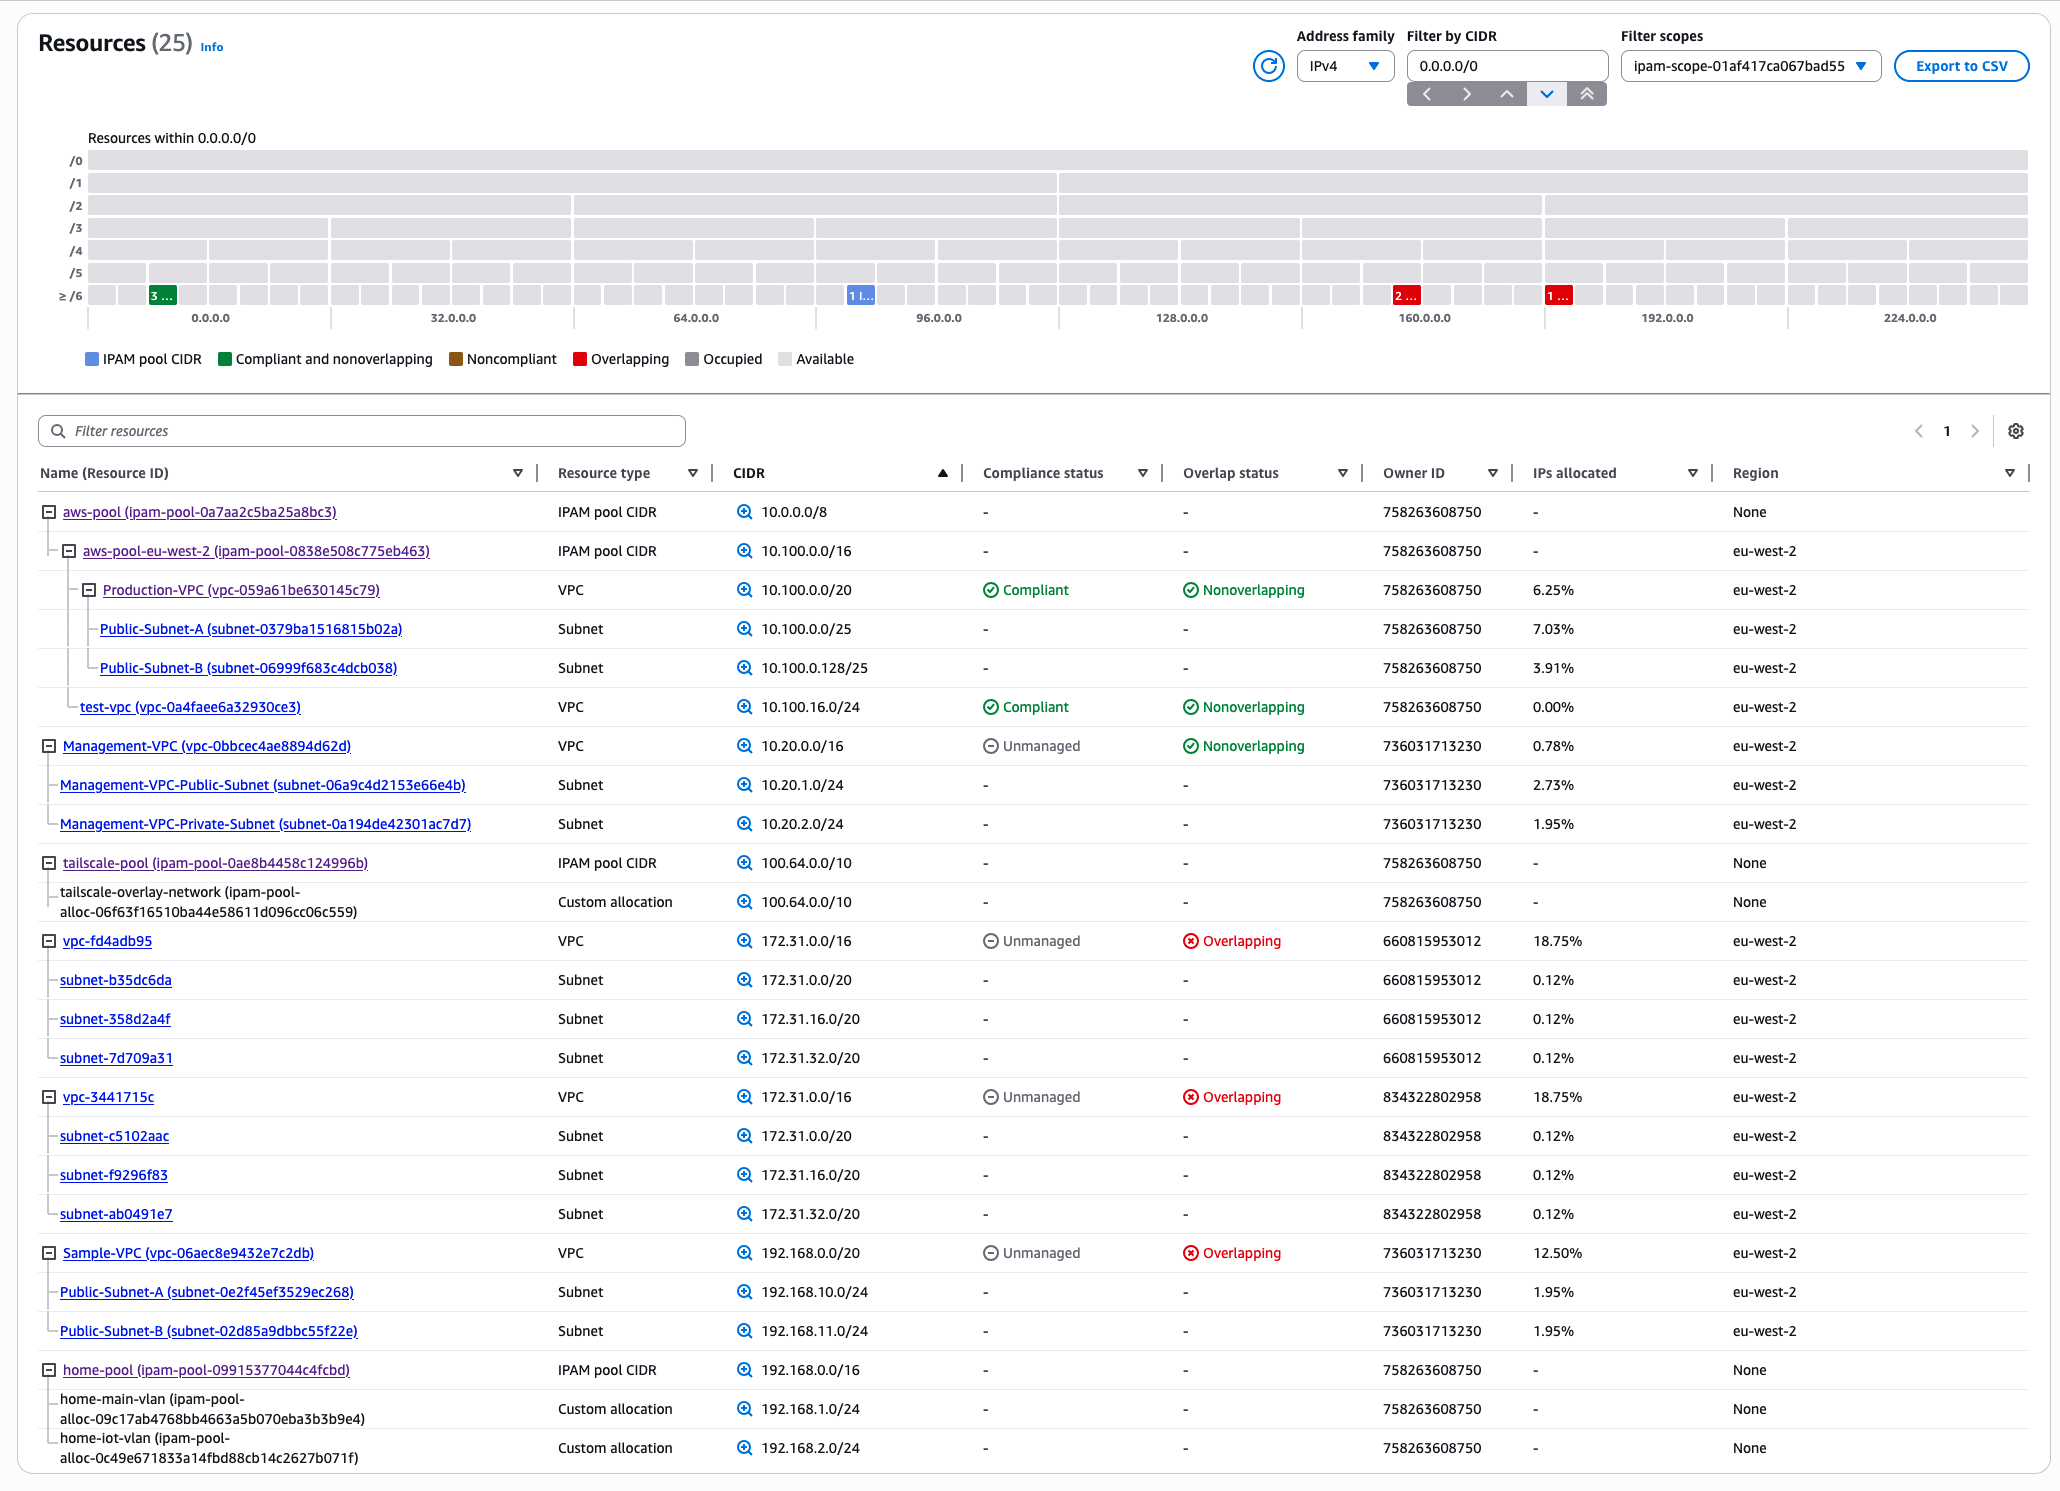
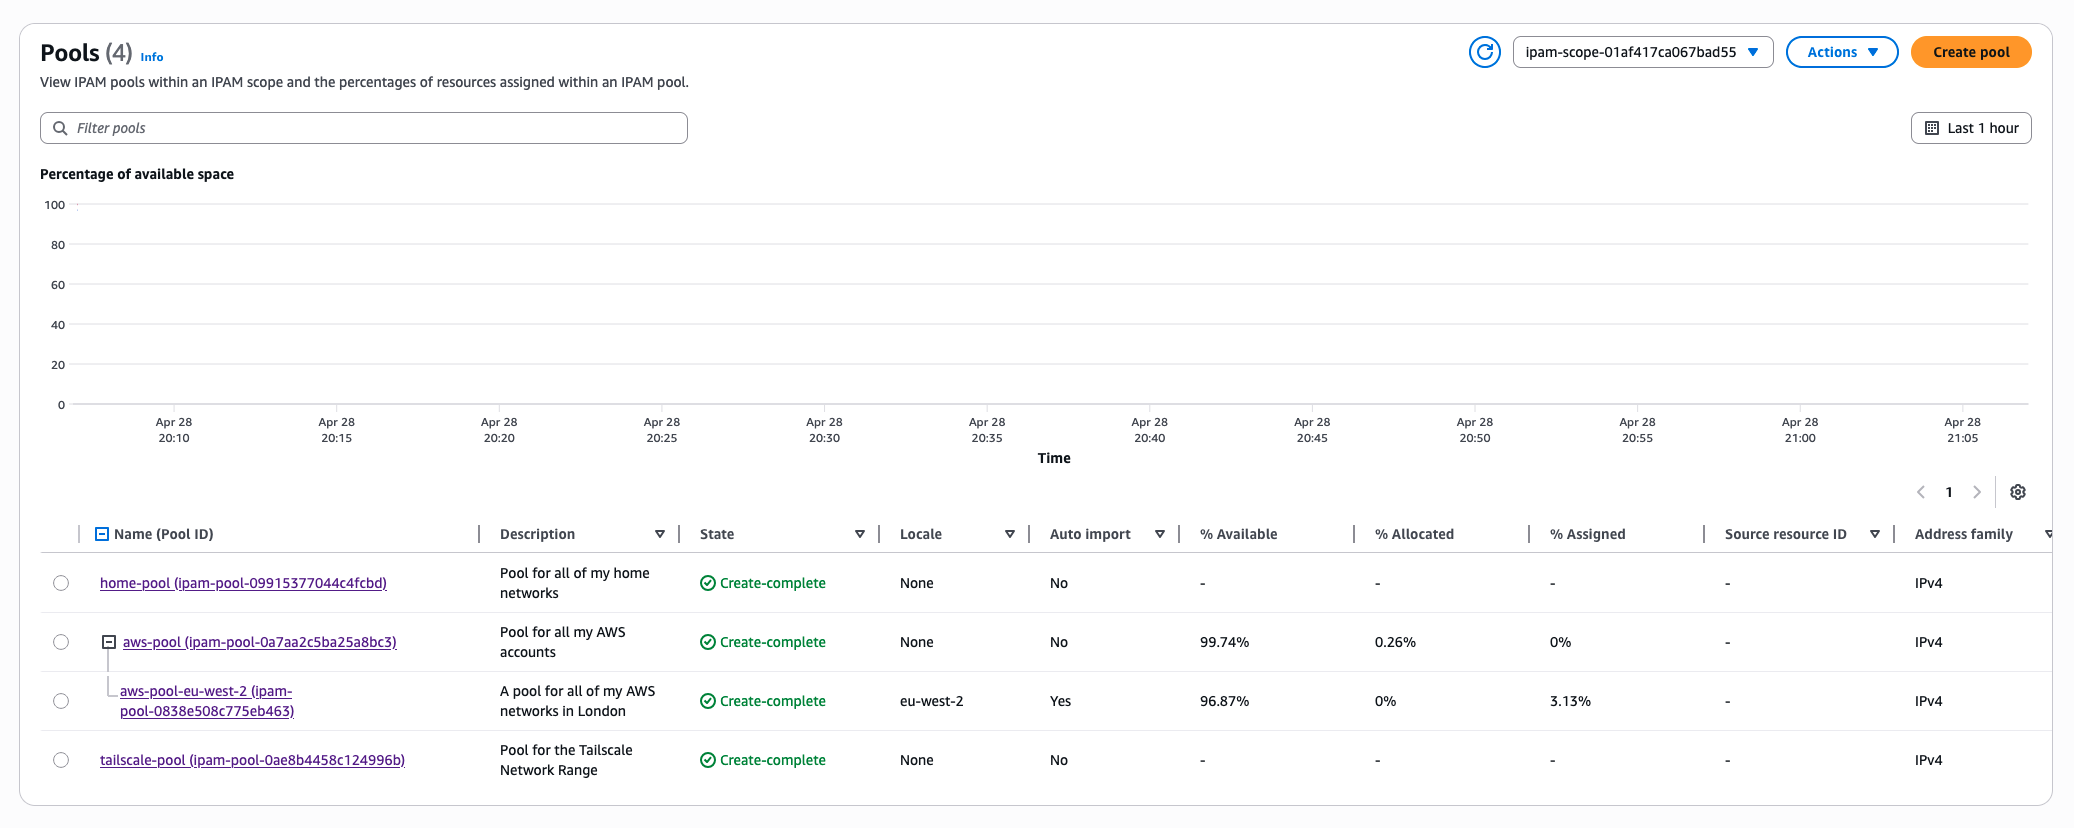
Finally, here are the resources within my AWS accounts, and as you can see, I had a lot more than I remembered! Spotted a Sample-VPC that I had completely forgotten about from some testing I did, and all the default VPCs that still exist in some of my older AWS accounts!
IPAM has its place, and it was fun to build. I am hoping that more features come to the product as it would be great to not only cover my home network, but my wider network behind my Tailnet!